Download RustDesk Client
Configure the Custom Server
-
Open RustDesk
Launch RustDesk after installation. You will see your ID and a Password on the main screen. Keep this window open.
You will need the ID and Password to receive support later.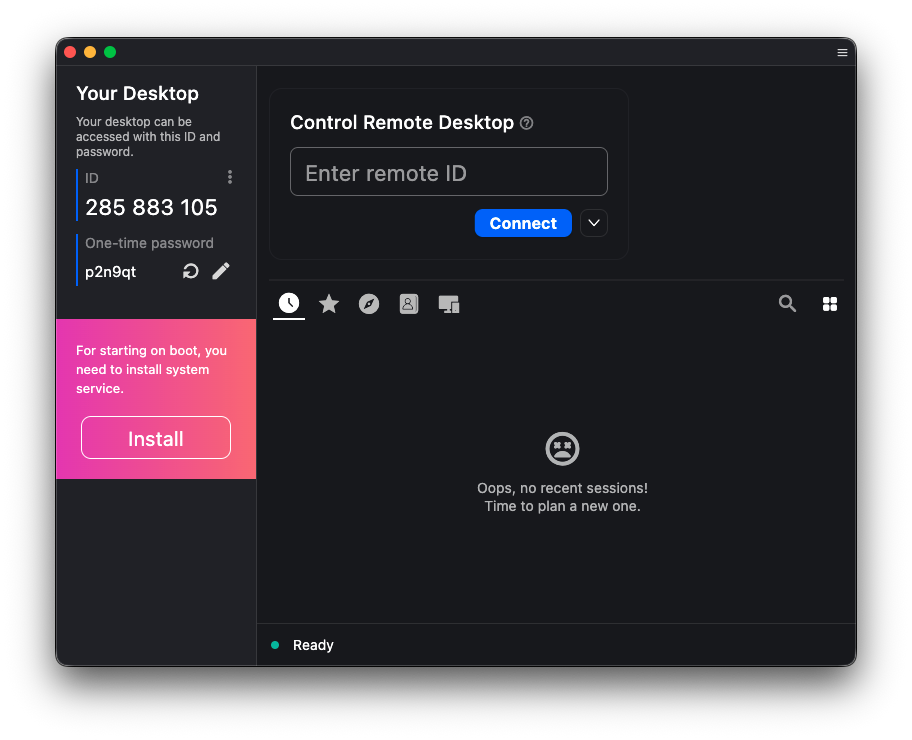
-
Open Settings
Click the ⋮ menu or gear icon in the top-right corner of the RustDesk window, then select Settings.
Inside Settings, switch to the Network tab and open ID/Relay server.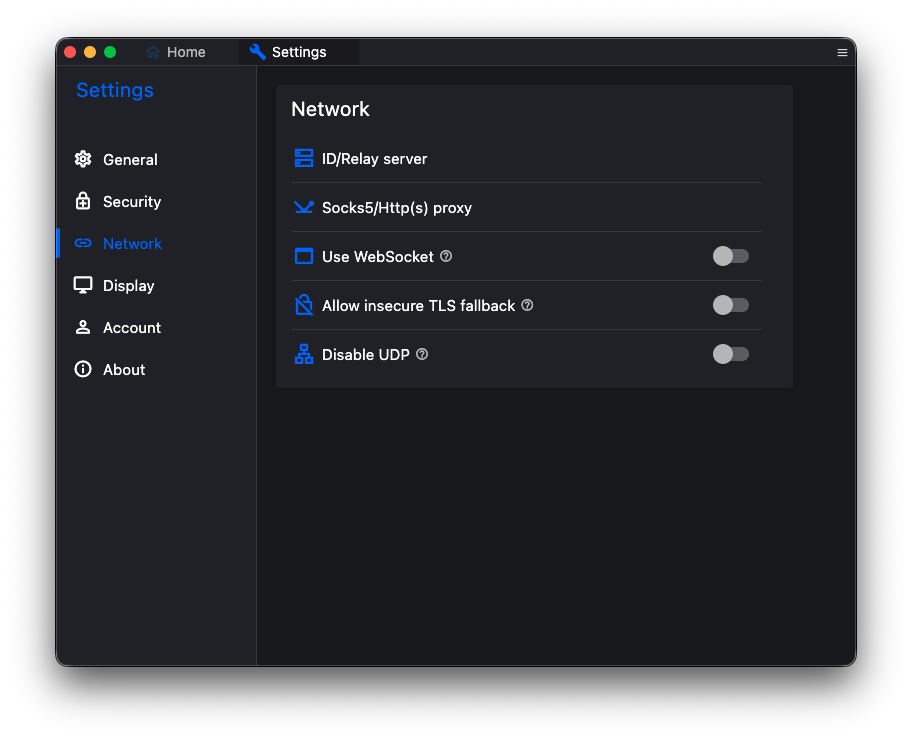
-
Enter Server Details
In the ID/Relay server dialog, enter the following server details:
ID Server:rustdesk.ostendorf.systems
Relay Server:rustdesk.ostendorf.systems
Key:dQCyNMENU+AL0caHkiH2cCvVssQS07G3chvyjUaEsMI=As an alternative, copy the server settings with the button below and paste them with the clipboard icon in the top-right corner of the dialog.
Already set up before? If your RustDesk still shows
remote.ostendorf.cloudas ID server, change it once to the values above. The key stays the same.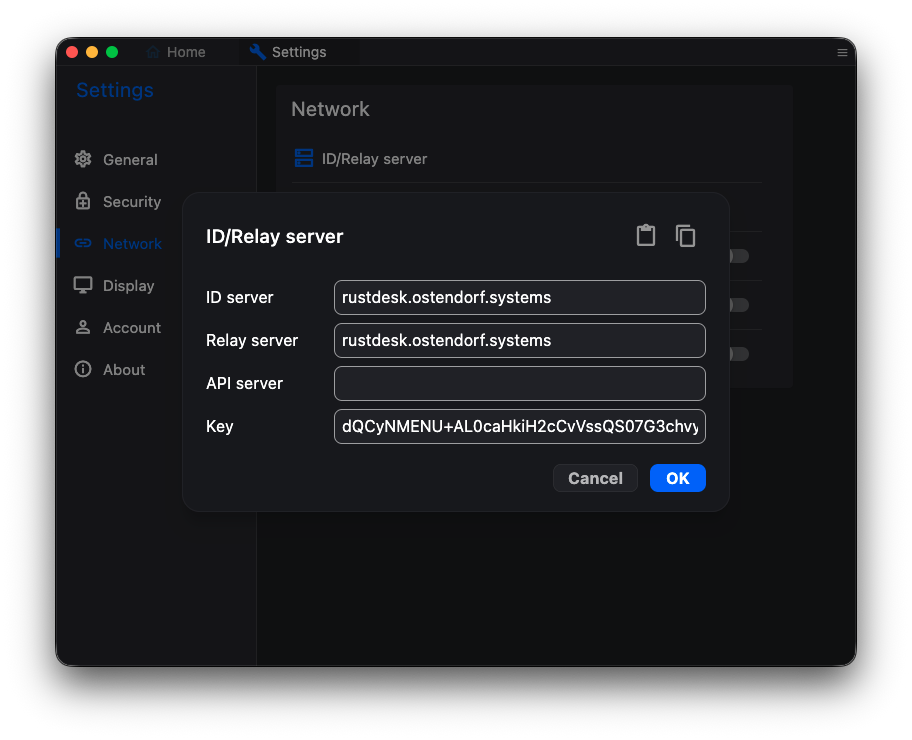
-
Apply & Verify
Click OK and close the settings window. RustDesk will reconnect to the new server automatically. The status indicator on the main screen should turn green. You're connected to the custom server and ready to receive support.